Tuesday, June 2, 2015

OAEC releases cookbook and our garden is on IUH urban farm tour!

Exciting things are afoot here in Northern California.

If you're not already familiar with the Occidental Arts & Ecology Center, they have just released their wonderful labor of love, the OAEC Cook Book. This is the cookbook for garden-to-table cooking, with a wide variety of very flexible recipes that will help you make the most of the incoming produce from your garden (or market).

OAEC is where I caught the gardening bug.

If you haven't visited OAEC yet, you have something great to look forward to. Run, don't walk to go to a plant sale or take a class. Any excuse to walk the gardens, talk to the volunteers and community members and - most exciting - eat a meal there. Their cooks make the most amazing, luscious vegetarian food I've ever eaten (and I'm happy to admit to being a big fan of meat). It's well worth the trek to Western Sonoma County.

In other exciting news, our little garden will be part of the Institute of Urban Homesteading's Urban Farm Tour for Oakland for 2015. Come take the tour and see incredible urban farms from big to tiny.


We hope to see you on Saturday, June 13!

Monday, May 12, 2008

Growing salad for two

If you've never had fresh, homegrown salad, now is the time to start. It doesn't take much space or sun, and your own salad will be so much better than anything you buy in a bag or a bunch that you won't believe you ever ate that sad, wilted stuff from the store.

You'll need about two square feet of garden bed per person. Prep the soil with lots of organic matter and mulch well with coconut pith.

To start, get two six-packs of lettuce per person and plant them at least six inches apart in staggered rows. Make sure you buy vibrant, young plants that are not root-bound, and of varieties that you like to eat. I do not recommend heading lettuce, though romaine will work fine. For each plug (if your nursery is like ours, there will be many seedlings in each plug, which is part of the plan), pull back the mulch, dig a small hole (really just pushing back the soil with your fingers), insert the plant, replace the soil and tamp, then replace the mulch.

When you're done, patch the mulch with more pitch and water in thoroughly.


You can also sow from seed. If you do so, sprinkle the seed onto the soil in foot-square patches of each type according to the planting instructions for the seed type. Don't be afraid of sowing too thickly because you will be thinning a lot of young plants. Sprinkle with more coconut pith, tamp down well and water in thoroughly.
The best way of watering is a twice daily sprinkling. Either automate this by installing misters on a drip system or using the mist setting on your hose. We find that five minutes twice a day is sufficient at 5 a.m. and 5 p.m. You want the water droplets to have a chance to evaporate before the sun hits otherwise you will get sun scald, which makes the lettuce inedible.
Once the transplants have recovered and started putting in new growth or your seedlings are about five inches tall, it's time to start harvest. Start by taking whole, young plants that are crowding others or otherwise badly placed (too close to the border, etc.). Snip them off at ground level. These greens will be very tender and require delicate handling. After a few harvests, you will be down to single plants spaced about six inches apart that are growing to about eight inches tall. Start harvesting the outer leaves for your salads, making sure to leave plenty of inner leaves for growth. At this point you will want to think about planting more seed or young plants in the spaces in between. As the big plants size up, begin to take whole plants for your salad, making sure to harvest them before they start to bolt (flower) or become bitter. By this point, the new plants that you sowed should be starting to size up and you can start the cycle again.

Harvesting lettuce
Try to take what you need without disturbing other plants or the root system. With some plants you can pull up on the stem after you've harvested the leaves and trim the stem below the mulch level, the pile pitch back over it for a tidy appearance.
Pile the salad into a basket or bowl, checking for slugs, earwigs and other unwanted guests (if you find them, toss them onto a flat surface like a sidewalk or road where the birds can get them). If it is very dirty, rinse with the garden hose (making sure the water is running cold) before bringing inside.
For very crispy salad (this works best with butter and romaine, but also works on other kinds), wash the salad well, then put in a plastic bag still very wet and let it sit in the refrigerator for a few hours or overnight. It will crisp up amazingly.

Site selection
Your lettuce bed should be as convenient as possible. If it's not possible to plant them directly outside your kitchen, get as close as possible. If you don't have bare ground or a raised bed outside your door, consider a planter box. If you have to travel to get to your salad, you won't harvest it enough. Put your salad bed where you will see it every day, and where you can access it easily. Be realistic.

Your salad should not get full sun in the summer. Pick a site that will be shaded either before or after noon (preferably after, depending on your climate). For a very hot climate, consider adding shading, such as shade cloth.

Bed cycling
For either method, about once a year harvest all of the salad and plow in the mulch, adding more organic matter like rabbit manure or another composted manure, worm castings and coffee grounds. If you have been having problems with predators, try a chicken tractor. If you are having disease problems, try rotating to another bed or planting a cover crop such as fava bans or an annual clover before growing lettuce again.

Pests
You will probably get some bugs, like pill bugs or slugs, nibbling on your salad. Our slugs seem to be very fond of the tatsoi in particular. There are many methods for deterring such little predators. I think the best method is to sow thickly and harvest a lot. That way it doesn't matter if the predators eat some, there's still plenty for you. Sluggo pellets also work very well for slugs and snails. Just strew the pellets on the ground around your plants.

Sunday, September 9, 2007

Garden gazpacho

I'm being overrun by cucumbers and tomatoes. Thankfully, there are recipes to deal with this. Here are my answers to an overabundance:

Gazpacho

Harvest as many ripe cucumbers and tomatoes as you have to. You should have about twice as much tomato as cucumber. Rinse and set aside.
For every four cups of tomatoes, include one large red onion, a quarter-cup of chopped cilantro and from two to five cloves of garlic (depending on your level of garlic-philia).

Roughly chop the tomatoes and toss them in a large bowl with a few shakes of salt. Stir well. Slice the cucumbers into small, bite-sized pieces and add them to the tomatoes, shaking in some more salt and stirring again. Dice the onion and add, stirring again. Mince or press the garlic and add to the mix with the cilantro (finely minced). Add two tablespoons of olive oil per quart.

Using an immersion blender, blend the mixture until soupy but still chunky. Salt and pepper to taste.

This is a very light and refreshing first course. I like serving it as a prelude to enchiladas.

Bruchetta

Harvest your out-of-control tomatoes. This recipe works best with dark, rich varieties such as Black Prince, red or black brandywine and so forth. Rinse and chop. Toss them in a bowl with a little salt. Then mince one clove of garlic per two cups of tomato (more for garlic-philes to taste) and mix.

Finely slice a small handful (a quarter-cup, sliced) of fresh basil per two cups of chopped tomatoes. Add and mix along with a tablespoon of olive oil per two cups. Salt and pepper to taste.
Serve with slice french bread or crostini (french baguettes sliced thin and toasted with garlic butter).

Both of these go very well with a light, low acid, red wine.

Wednesday, August 1, 2007

Harvest hints

Harvest is my favorite time in the garden. The peas ripen and the tomatoes turn color and get soft, when the fruit starts ripening on the tree and all the vegetables are ready to pick. This is a critical time, and a good gardener/eater has to be on the ball.
It's all too easy to let all your hard work go to waste with just a few days of neglect. A forgotten broccoli will go from perfect to hard and bitter in just one or two days. Tomatoes will rot and drop off the vine, drawing vermin. Lettuce will bolt. Peas and beans will get hard, perfect for shelling or storing, but no good for munching or stir-fries and killing the vine before its time. A hidden zucchini grows to dangerous proportions. For example, this basil is getting ready to bolt and should be picked right away.
It's at this time of year that it's really important to get into the garden every day, to harvest the fruits of your labor.
It's important to know when your fruits and vegetables are ready to pick. If you planted something from seed, you can usually go by the picture on the seed packet. Once something is ripe, pick it. If you wait, it will usually go bad in one way or another very quickly.

Many vegetables can be picked and enjoyed at many times. Peas and beans can be eaten as soon as they're big enough but before the seed bulge gets big. Pull them right off the plant.


Cucumbers are edible from their tiniest forms (and can be fun to pickle when they're tiny if you grow an abundance). Cucumbers, like beans, are best pulled firmly off the plant. Harvest them before they get big. By the time the skin gets streaked and dry-looking, the insides will be watery and the seeds will have started to harden.

Zucchini can likewise be eaten small (and it's wisest to do so). Cut squash off the vine through the woody stem.


It can be tricky to tell when carrots and other root vegetables are ready, unless they pop out at you.
But if they're still in the ground, you can tell how big around they've gotten by pulling the mulch or soil back from the crown. If it's not ready to pick, carefully mound the mulch back up to prevent hardening.

Tomatoes are ready when they've turned color and are soft to the touch and easy to pull off the vine. Cherry tomatoes should come off with the merest tug. For larger tomatoes it's best to cut the stem since pulling will tend to tear them.
It's usually best to harvest your vegetables right before you intend to use them. If you'll be cooking them right away, rinse them off in the garden (if they're dirty or dusty - peas, for example, might not need any washing), and prepare them.
If you have too much of something to use before it gets overripe on the plant, try to harvest it in the early morning before the sun warms it. Dry it off carefully and refrigerate. Unless it's tomatoes: never refrigerate ripe tomatoes. It ruins the aroma and taste. That goes for most fruit: peaches, plums, nectarines, and certainly all berries.

Wednesday, July 18, 2007

Garden recipes

Here are two of my favorite recipes that use lots of produce. The stir-fry in particular is great for whatever is in abundance. Feel free to alter according to your tastes.

Garden oyster stir-fry

8 oz oyster mushrooms
Several bunches tender greens (bok choy, mustard greens, etc.)
4 medium carrots
sesame oil
salt
low-salt soy sauce or tamari
garlic
ginger
green onions, chopped

cooked noodles or rice (I prefer brown basmati)

Chop the mushrooms and carrots into bite-sized pieces. Get a cast-iron pan very hot. Drizzle in a little of the oil, then quickly put the mushrooms in. Sprinkle a little salt on them as you fry the mushrooms. When they are golden brown, remove them to a bowl or plate drizzle them with the soy sauce. Put in the carrots. Stir the carrots occasionally. When their edges start to brown, add minced garlic and ginger to taste (start with one teaspoon of each) and a half-teaspoon soy sauce (more to taste if you wish) and fry until the garlic starts to brown. Add to the mushrooms. Reduce heat and add the greens, torn into pieces. Add a little soy sauce and cover until steamed slightly, then uncover and stir-fry until dark green and tender. Add carrots and mushrooms and stir to mix. Taste and add more soy to taste.
Serve over rice or noodles and garnish with the green onions. Serves two.

Oyster mushroom salad

Select bunches of very young oyster mushrooms for this recipe. For the salad I prefer a mix heavy in spinach or tatsoi.

8 oz oyster mushrooms
olive oil
salt
pepper
four big handfuls mixed salad greens
honey mustard salad dressing

Toss the salad greens with a few drops of olive oil and serve into salad bowls.

Tear the mushroom bunches apart into smaller bunches of three to four mushrooms each. Heat a cast-iron pan until quite hot and drizzle with olive oil. Add mushrooms, sprinkle with salt and pepper and fry until starting to soften.
Serve onto the bowls of salad greens and drizzle with the dressing.
Serves two.

Labels: , ,

Wednesday, April 25, 2007

How to sheet mulch

If you've gardened from scratch, you know how backbreaking it is to till the soil. Just as spinning a yard of yarn with a drop spindle makes me appreciate both the countless woman-years of effort that went into making clothes in the past 20,000 years and modern spinning and weaving machinery, so tilling even a few feet of garden bed makes me appreciate the wonders of sheet mulch.

I'll admit that sheet mulch isn't for everyone. Maybe you only have a few feet of gardening space. Maybe you miraculously have no weeds and rich, tilthy soil. Maybe you adore weeding and have knees and a back of iron. If you have none of these things, sheet mulch is probably a good idea for you and your garden. Sheet mulch is an excellent way of introducing lots of organic matter, something that the tough clay soils of the Bay Area need greatly — without back-breaking digging and tilling.

Much has been written about sheet mulch. Everyone seems to have different experiences. Some swear mulching will bring hoardes of slugs to eat your plants. Some say it robs roots of air. I've had excellent experiences with it in a variety of circumstances, and can recommend nothing better for keeping the soil moist, keeping down weeds, beautifying the area and preventing erosion.

A sheet mulch is a layered effect. First, cut down all the plants you don't want in an area. Then add any compost you want directly on the soil (coffee grounds are great here, as are any seedy or weedy composts you have on hand. Then lay on your sheets. Water them down and step on them (this helps shape them to the ground and absorb more water. Then lay on your organic matter. Water that in. That's it.

Choosing your materials

Before you start, you'll need to acquire your materials. I almost invariably use cardboard, but some folks swear by newspapers (though it can be tricky to lay your hands on so many), old wool carpet, phone books (I'm not kidding), felt and old sheets. I got my hands on a roll of old architectural drawings, which are nice for small spaces. My basic rule of thumb for sheet mulch materials is that you need about five times as much as you think you could possibly use.

I favor cardboard because it's easy to harvest in an urban area, is easy to work with, can be cut through in place for plantings and does an excellent job of keeping weeds from coming through. I had previously haunted appliance stores for my supplies, which worked very well in the Santa Rosa area. I recently discovered that auto body shops get their new fenders, etc. shipped in enormous, heavy boxes. Your area probably has a semi-industrial street/city highway with lots of auto body and furniture shops on it. Cruise down it early on a weekday morning and you'll probably see workers tossing big cardboard boxes out the front door as they unpack them. That's the time to grab them, and the employees are usually happy to let you haul them away. If somewhat puzzled. If you have a friendly relationship with a store that gets shipments in cardboard boxes, ask about coming in when they unpack them and taking them away. Some places sell their boxes or have other arrangements, so be prepared to take no for an answer.

title or description

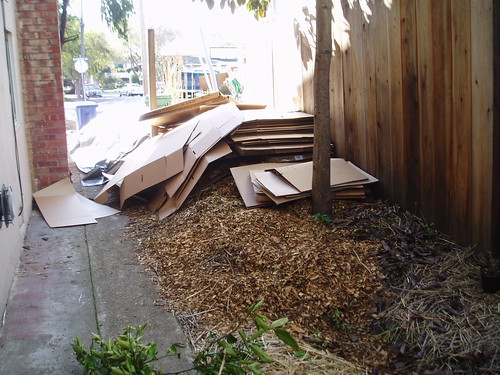
Yes, that's an enormous pile of cardboard. It looks bigger than it is because it's on top of the enormous pile of wood chips that I asked a tree trimmer to drop off at my house.

title or description

Call around to the various tree trimming businesses, like 
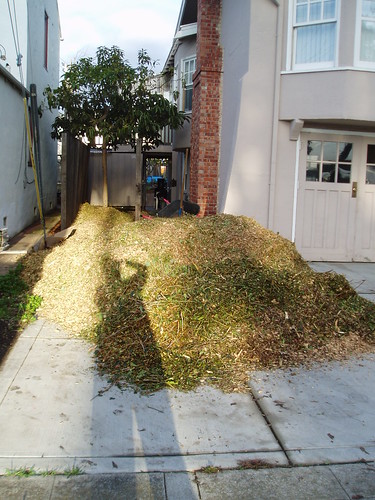
Ponderosa in Berkeley. They'll drop off freshly chipped tree trimmings for free. The catch? You need a big driveway for them to dump it in, and many can't give you notice before they dump. So you come home one day and find 20 yards of wood chips in your driveway. For perspective, that pile above was about 6 or 8 yards. If you're willing to pay money, you can get nicer wood chips, screened and composted, delivered on schedule.

Wood chips aren't the only mulch, and you don't want to use them in areas where you'll be planting vegetables. Straw is a nice mulch (though you're much more likely to track it back into your house). You can get straw (not hay - hay is the tops of the plants and has a lot of seeds in it) at some animal feed stores for about $8 a bale. If you like near a horse race track, you can also buy it in the back parking lot for about $5 a bale. Bring cash and a truck.

The organic matter you use depends on what you're mulching for. If you're mulching a walkway, big wood chips are great. If you're mulching in anticipation of planting in the spring, composted manure is perfect. Rotted hay has a strong following for that purpose. Straw is nice because you can walk on it and plant through it (more on that later).

If you want a straw mulch to last a long time, rice straw works great. It's both stiffer and longer-wearing than barley (softest) or wheat (pretty stiff) straw. In California, rice straw comes from the Sacramento Valley rice-growing region. It's generally harder to find than wheat or barley straw because equestrian folks don't tend to use it (people who build with straw greatly favor it for its high silica content).

If you're using straw mulch near plants, particularly wheat straw, check the bales for seed heads. A poorly tuned combine will leave many seed heads in the straw left behind after harvesting the hay. If you mulch with seed-rich straw, you'll end up weeding out hundreds of little wheat plants.

Down to business

If you have your sheets, organic matter and hose, you're ready to start. First, cut down the standing plants you don't want to keep. Some plants, like bermuda grass, blackberry and potato, are really good at punching through sheet mulch. Dig those out as much as possible. You can leave dandelion, grasses and other non-sprouting plants on the soil for the worms to eat. If the soil is dry, water it well before laying down your first layer of sheets.

In your weeding, make sure you do a very thorough job around the edges. The edges are where weeds will tend to come up and destroy your mulch. In some areas, we've taken the precaution of digging out the soil and replacing it with wood chips at the edges. Even if you don't go to those lengths, make sure the ground is good and clear at the edges.

title or description

Then you can lay on the cardboard or other sheets. Big sheets are a really good idea.

title or description

That's a box from an auto body shop. Make sure you overlap the sheets by at least six inches. No part of the ground should be visible, but plants can travel sideways for some distance, so the more you overlap, the harder those plants will have to work to break out. The thicker your layers, the better the chance the plants will run out of root energy before they run out of sheets to go around. If your mulch is going to last more than a year or two, use three layers of heavy-duty cardboard. Make sure the overlaps in your second layer are right where the first layer was most solid.

title or description

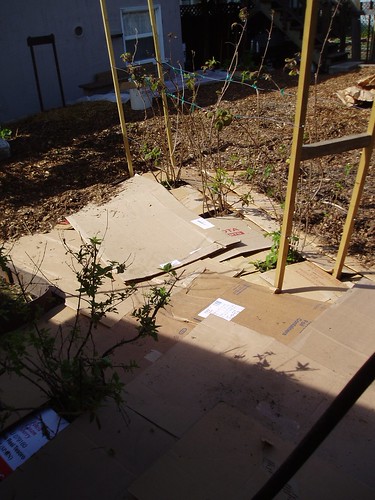
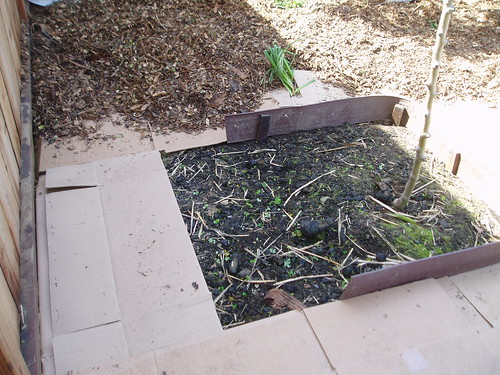
You can tear or lay down the cardboard or other sheets to go around plants you want to save.

title or description

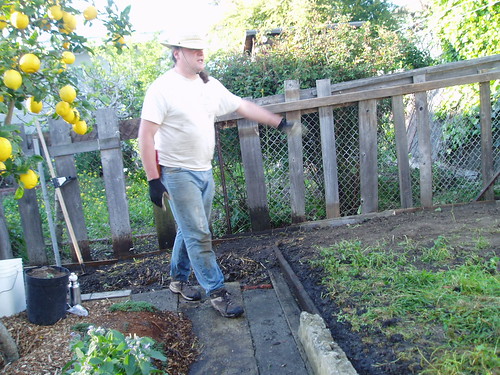
When the layers are done, watered in and trampled, you can add your organic matter.

title or description

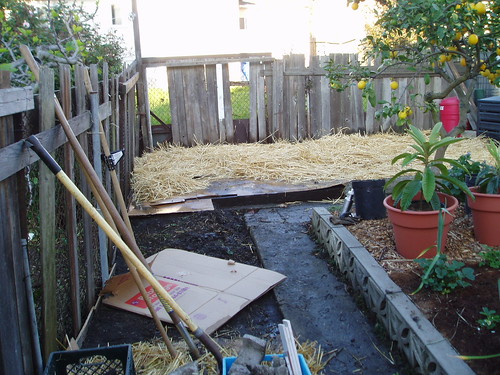
Then water in the organic matter (make sure it's wet all the way through - a sprinker is an excellent way to do this).

And then you'll be all done.

title or description

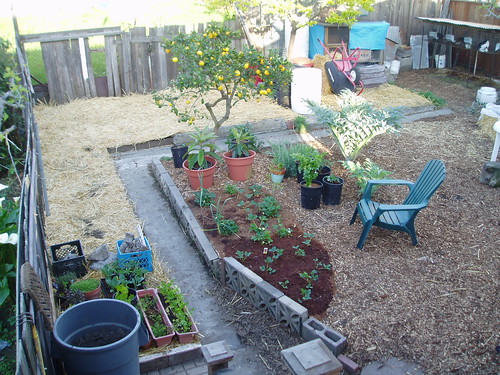
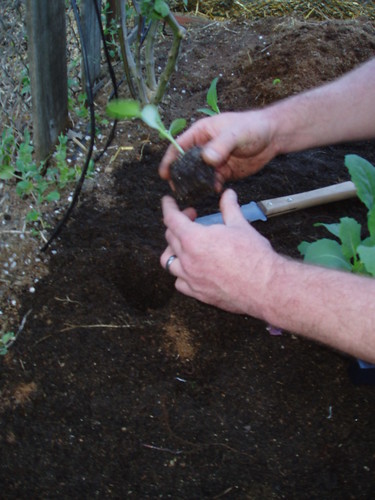
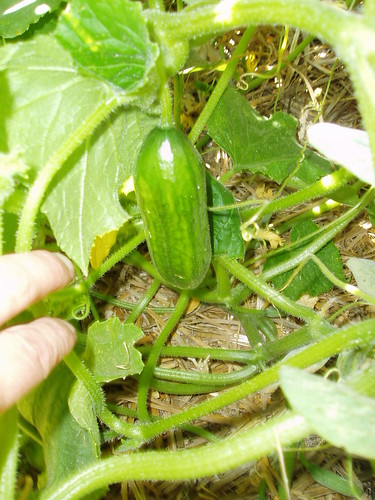
If you're planting right away, you can either built a bed on top of your sheet mulch with soil (like we did with the strawberries, above) or make holes in the mulch to plant into.

holes in sheet

If you've just mulched recently, the soil will still be nasty, sticky clay, so dig the hole about twice as big as the root ball of your plant and amend heavily (I recommend coffee grounds). After planting, tuck the mulch back around the plant. It's nice to mulch around the base of the plant with coconut pith.

It's great to sheet mulch in late fall/early winter. Then the mulch protects the soil from the winter rains, and the organic matter, continually moist, breaks down into fertile soil, ready for your spring plantings. Beneath the cardboard in cover of darkness, the worms are working, transforming that clay soil into worm castings, lovely rich soil that your plants will adore.

Labels: ,

Friday, April 20, 2007

Inspiration

I used to live and report in Sonoma County, which has some awesome farms and food. Here are some articles I wrote about food and gardening:

Market to table
I made a dinner for four made from ingredients bought at the Sebastopol Farmers Market (and a few things from my garden).

Cooking with wild mushrooms
A year into my obsession with mushrooms, I interviewed local mushroom gurus about their favorite ways to cook up the elusive wild mushroom.

Making compost
One of the articles I wrote from my permaculture training at OAEC, I talked with the experts on turning trash into treasure.

Not just thistling, Dixie
On the importance of battling invasive thistles.

Making sushi
You're probably not growing the ingredients, but oh so tasty. Mmm... raw fish.

Making mead
If you raise bees (and don't we all love an endangered species), you should know how to make mead, honey wine.

OAEC's biodiversity tasting
I've been to two of these marvelous events so far, and found some of my favorite things to grow there. When I went they had a dozen different tomatoes, eight different basil pestos (my favorite was cinnamon basil - amazing depth of flavor. We're growing two dozen of them this year), six sauteed greens (my fave: magenta lambsquarters), herb water, 10 different garlics and an extravagantely diverse salad. They haven't announced one yet for 2007, but if you get on their mailing list, they'll let you know.

Sebanana
Just to show it's possible, Sebastopol man grows bananas. Commercially.

Raising rabbits for food
Both vegans and meat-eaters in denial about where their meat comes from were horrified at my description of a small rabbit-raising operation. But it's the most ethical meat I've ever eaten. Also delicious.

Monte Rio school garden
And because school gardens are the coolest and most important thing ever, Monte Rio School grows its own salad! Yeah!

Labels: , ,