Starting from scratch
The first thing that most people want to do when starting a garden is sprouting seeds. Is there anything more rewarding than seeing delicate little seedlings poking their green heads out of a moist bed of rich, brown soil?
Is there anything so frustrating as failing to see those seeds sprout, day after day, week after week. Lots of things can go wrong, and I've probably done them all. Here's what I do to get my seeds to sprout.
Sprouting your own seeds is cheaper than buying plants, and you can make more precise decisions about the varieties you'll grow. Most of the conventional seed you see at the stores is not good stuff. I've had good luck with seeds from Territorial Seed, Seedsavers Exchange, Abundant Life, Renee's Garden, Swallowtail Gardens and Seeds of Change. I also love to save my own seed, and I buy plants, particularly from the Occidental Arts & Ecology Center's spring and summer plant sales and Spiral Gardens in North Oakland.
Shopping list:
Organic potting soil (finer texture is better)
Black plastic six-pack trays with under-tray and clear plastic cover
Bricks of coconut pith/coir, wetted and fluffed into a bucket
Labels
Seeds
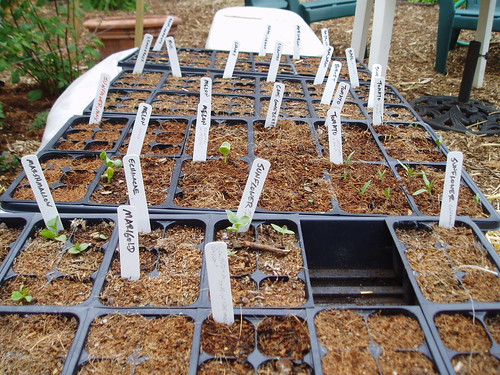
Label the tags with the names of the plants that you're planting. Put about an inch of the potting soil in each then fill them up most of the rest of the way with the coconut pith. Then put a seed or two in each, then cover them lightly with the pith. Then water them in, put the plastic cover on and set it somewhere where they will stay pretty consistently warm. Plant at least one six-pack of each plant (you should have plenty of room - the trays usually hold 16 six-packs), and stick a label in each six-pack.
This is what your seedling trays might look like after a few weeks:
Sprouting in the tray has a lot of advantages: you'll be able to choose the strongest plants and position them appropriately. Also, clay pots lose water pretty quickly. For seedlings, you'd have to water them 2-3 times a day. The covered sprouting tray holds water pretty well, and you should only have to water once a day. Garden beds hold an array of dangers for tender young sproutlings.
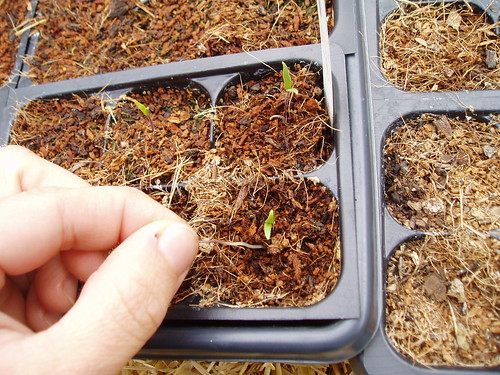
Keep your seeds watered. If you get very warm, sunny days, pull the plastic top off, particularly once the seeds have sprouted. The soil should stay damp, but not wet. If green stuff starts growing on the pith, your soil is too damp, and you should dump out the under-tray.
It's very important to thin your seedlings. Pick the ones that have the fewest abnormalities in their leaves, grow the fastest and are growing closest to the center of the space. Thin out the rest of them by pinching their stems as close to the soil as you can and drawing the root out.
It's painful to kill those tiny plants, but the ones you leave behind will be much better for it.
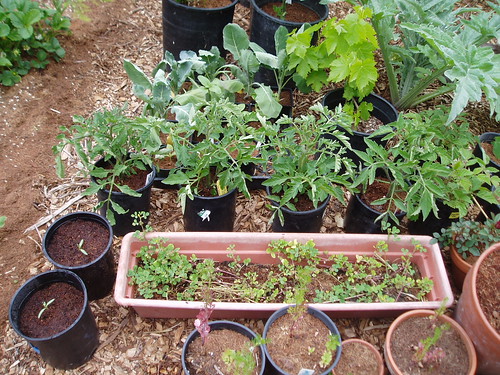
Once your seeds have sprouted and grown up a bit (have started to show leaves besides the first two seed leaves that came up), choose the strongest looking plants for transplant.
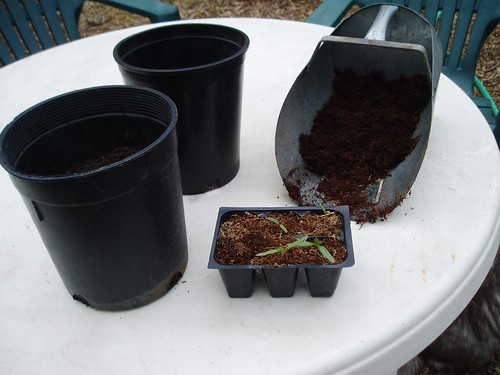
Transplant before the seedlings become root bound, where the roots wrap around the inside of their container. But you want the roots to have reached the walls, so they will hold the root ball together. It can be important to fluff the root ball when transplanting.
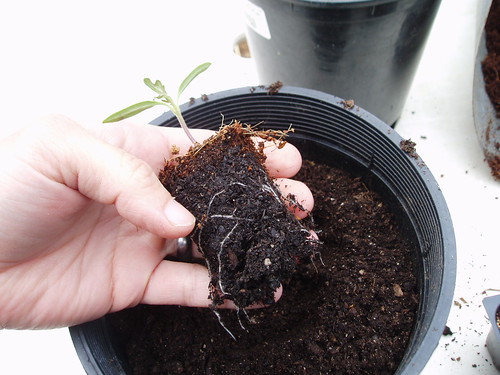
Some plants need more fluffing than others. The tomato plant above required none at all - you can see how the root tips have barely filled out the soil. That's just about the perfect time to transplant. I've been warned not to fluff some at all, but I can't remember which ones. Mainly, you need to keep your fluffing in line with how tender the roots are. For tiny seedlings going into their first four-inch pot, a little poke with the fingertip will do, just enough to loosen up the soil. On the other hand, I once transplanted a feverfew (a very hardy, medicinal herb) from a five-gallon pot into a 12-gallon pot. I gripped the feverfew by the stem and slammed it into the asphalt over and over, barely dislodging any soil, the plant was so root bound. Upon transplanting, it did just fine. So use your judgment when fluffing.
If you're transplanting into clay pots, soak the pots in water for a few hours or overnight (only if they're new - you wouldn't believe how much water they soak up), set them on their saucers and fill them most of the way with potting soil. If you're using plastic pots, just make sure they're not too gross or cracked. Ease the seedlings out of their six-packs (it helps to pinch the plastic while turning it on its side). If the roots have started to wrap around the inside of the plastic, fluff them out gently. Then position it in the pot with one hand, and scoop more soil around it with the other. The top of the soil should be about two inches down from the lip of the pot.
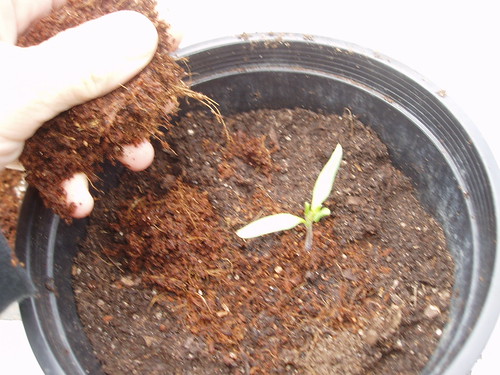
Tamp it down firmly, then water it in. Then add an inch layer of coconut pith, and water it in again. Then set the plants in their places (someplace sunny!).

Also, make sure you have several different types of plants around your seedlings. A bunch of one kind of plant looks like a smorgasbord to an insect predator.
It's harder to grow perennials from seed, and would probably be easier just to buy them from a good nursery. But check for aphids and other problems (particularly the undersides of the leaves) before you bring them home.
Mulch note:
It's also possible to use peat moss, rather than coconut pith, as mulch. However, peat is a fossil resource that, left in place, sequesters carbon, filters water and protects historical artifacts. Coconut pith is an agricultural byproduct. It also looks a lot like redwood bark mulch, so if anyone disses your garden for killing redwoods, you can say, "No, it's coconut pith, an agricultural byproduct." Use a good, heavy layer of mulch. It keeps your watering from eroding the soil from the roots and helps retain water.
posted by Dawn Pillsbury @ 4:02 PM
0 Comments
![]()


0 Comments:
Post a Comment
Subscribe to Post Comments [Atom]
<< Home